The process of setting up Google Ads might seem complicated, but anyone can use this service to produce great results. This article outlines the step-by-step process of setting up a Google Ads account and setting up and executing your very first little Search advertising campaign.
With this post, you will be able to accomplish the following tasks:
1) Set up your Google Ads account and establish your basic settings;
2) Create a small Search campaign to drive traffic to either a useful blog article or a signup form;
3) Test the effectiveness of your ad campaign with a low-cost test (with a low daily budget) and view the results of your test.
To get started, here is a short checklist:
1) You have a Google account (i.e., Gmail) and are logged into your Google account on your browser.
2) You have an available URL for your blog article or landing page (i.e., the page where ad clicks will go).
3) You have a small test budget available (recommendation: ₹50 to ₹200 per day or equivalent).
-
Log in and access Google Ads account
To log in to your Google Ads account:
- Open up the browser, remain logged into the Gmail account you will use for your ads.
- In the search bar, type in “Google Ads.” Click either the blue Start Now button or go directly to the Google Ads log in page
 Log into your desired Google account to use for the ads.
-
Creating your Google Ads account
- After you have clicked Start Now, when you get to the account email page pick which email you want. This is the email where you will receive all emails regarding your Google Ads account.
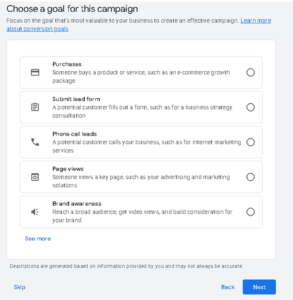
- On the goal page choose the simplest applicable goal that you have for your ads; generally this is getting visitors to your website or getting more sales/sign-ups from your website. If you would rather not select goals, you can skip that and choose Expert mode. However, we suggest you go with the guided flow for your first campaign.
- Once you’ve selected your goal and chosen whether or not you want to use Expert mode, you will enter the business name (this will appear on account settings) and the billing country/currency.
Quick note: Be very careful with the choice of currency and time zone. This has an impact on your reporting and billing, and is very difficult to change once the account has been set up.
-
Campaign type: Search (simple and effective).
- When you are on the campaign creation screen, select the Search campaign type. Ads created in a Search campaign show up to people looking for help with their queries in Google.
- Pick a Campaign Objective (Website Visits or Leads)
- Select Campaign Type: Search (Google) – suitable for locating users seeking information about your organization or services.
-
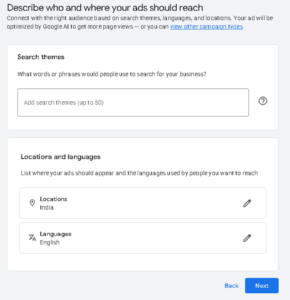
Choose location and language target
- Choose your desired location for the ad to be displayed from your locations.
- Select “Current Location based” from the list. It is recommended to limit the target area to your local audience as this will help save you money on clicks that are not actually relevant to your business.
- Limit the language used for the ad to the language your landing page contents are written.
- Remember – Limit your target area to help reduce costs (e.g., if your audience is from a city, you might want to only target that city).
-
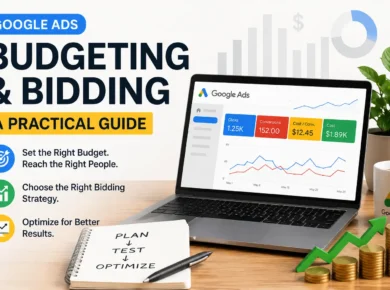
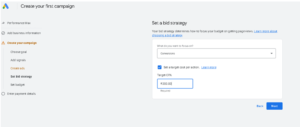
Daily Budget / Bid Preferences – Easy Start
Decide on a daily budget you are comfortable testing with (try starting with a low amount, e.g., 50 rupees – 200 rupees/ day). A daily budget lets you control the amount of money you would spend at the end of each day.
Set your bid type of “Maximized Clicks” when you first begin. This allows for the easiest method of bidding. As a beginner, you can use either “Manual CPC” for more precise control or “Maximized Clicks” for ease of use.
Make sure to keep your daily budget small until you are familiar with using Google Ads & use “Maximized Clicks” for your test campaign.
-
Create your group and keywords for your ads.
An ad group holds ads with related keywords; for example, create a group named after your theme such as “Dinner recipes quickly” or similar.
Create a list of 8-12 related key phrases that users are searching for and put a mix of broad and exact keywords in this list such as:
“dinner recipes” (exact)
“recipe for dinner that is quick”(broad).
In case any negative keywords you need to add to your account so you do not receive irrelevant traffic immediately such as free, torrent, low-cost (this would cause you many unwanted clicks).
Non-technical keyword tips: Type what someone would type into Google when looking for the same product and write using phrases not long sentences.
-
Write clear and simple ads.
Write two short ads so you can see which one performs better. Each ad provides a:
- List what benefit or subject matter is being provided. (ex. 30 Minutes Healthy Dinner).
- List how fast or what is being offered. (ex. Easy Recipes for the Busy Person”).
- One sentence explaining to the reader what they are getting. (ex. Free Recipe book with step-by-step instructions and shopping list.)
You can use a clear display path to help create a clearly readable URL. (example: yoursite.com/recipe-directory).
Advertising tips for non-technical people.
Be honest. The landing page must match what was promised on the ad when they arrive; if the ad says “free guide,” the guide should be there when they get there.
Be sure to explain the main benefit in your headline and give a brief description in the body of your description.
-
Configure your landing page and complete all final checks.
Enter the final URL (this is where users will go once they click on your ad). The page must load quickly, and the user must immediately see the promise made (general info, subscribe, download, read).
Preview the ad to see that the headline and URL both look correct; screenshots should match your promise when you preview the ad.
-
Provide billing information and then launch the ad
If you did not already enter your billing information (typically a credit card or local POS payment method), you will need to enter it before Google will charge you. Google will give you the option to enter billing information (including credit card type) and provide the payment options to you; they charge you based on your budget.
After reviewing all of your campaign settings, you can click either Publish (if finished) or Save (if incomplete) to submit your ad(s) for review. Ads will be reviewed very quickly by an automated process and, if approved, will be able to run immediately thereafter.
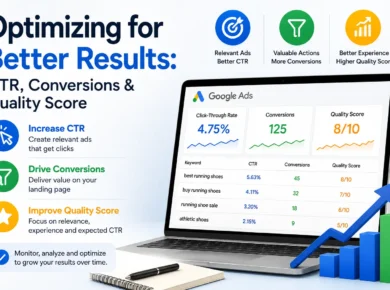
What to check for in week one is going to come down to the least technical measure of performance. Clicks — how many clicks your ad received. Cost per Click (CPC) — what you spent per Click on average for each. Conversions — the total number of conversions for that “conversion goal” you set up for tracking (like e‑mail subscription or another goal), assuming you had tracking set up correctly for measuring those conversions.
You should check these items daily for unusual behavior (lots of clicks with no conversions, for example) and, if your costs rise above normal levels, you may need to pause the keywords or ads.
Simple Optimisation Checklist for First 2 Weeks
- Pause any keywords that received a high volume of clicks but yielded zero conversions for the week.
- Add negative keywords to reduce irrelevant search terms in your search queries.
- Determine, using either of the following methods, which ad headline gets the higher CTR (Click Through Rate) and keep the better performing ad headline and stop running the winner.
- If a keyword is generating a high CPC but has a low conversion rate, reduce your bid amount to less than your current bid or stop running that keyword altogether.
One simple test you can run today in 30 minutes is:
- Write and publish a single blog post that describes how to prepare 5 quick healthy dinners or a single landing page that describes how to prepare 5 quick healthy dinners.
- Set a Search campaign as detailed above using 10 keywords (related to one another) with a daily budget of 50 and two ads.
- Let it run for 7 days and then check how many clicks you’ve received as well as which ad has received the highest click through rate. Pause or decrease bid amounts for those keywords based on the results.